Large-format tiles have become one of the biggest trends in modern architecture. Their sleek lines, minimal grout joints, and luxurious appearance make them ideal for homes, commercial spaces, and high-end interiors. Among the available sizes, 600x1200 mm Large-Format Tiles stand out as a perfect balance of size, style, and practicality.
To help you get the best results, this detailed guide covers everything from tools and preparation to installation techniques and aftercare. Whether you're a homeowner, contractor, or designer, this step-by-step walkthrough ensures your installation is flawless.
What Makes 600x1200 mm Large-Format Tiles Unique?
Large-format tiles are defined by their expansive size, usually exceeding traditional tile dimensions. The 600x1200 mm Large-Format Tiles offer a modern, seamless look that reduces grout lines and creates an elegant visual flow.
Because of their size, these tiles demand precise handling and proper installation methods. Their structure is typically denser and more refined, offering excellent strength, especially when produced by premium manufacturers like Liberta Vitrified.
Compared to regular tiles, large-format pieces provide:
-
Fewer grout joints for easy cleaning
-
A luxurious, spacious appearance
-
Better surface continuity
-
Versatile use on floors and walls
Tools & Materials Required for Installing Large-Format Tiles
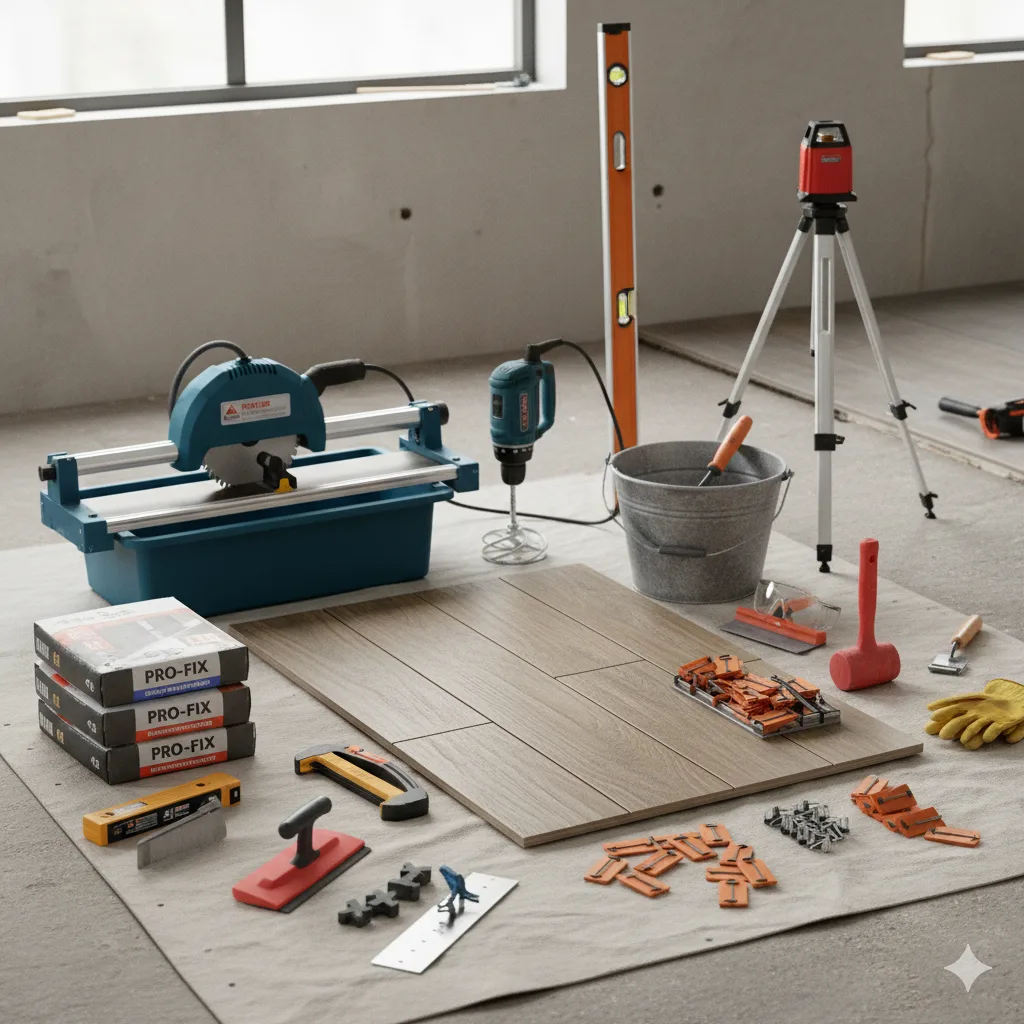
Before starting, gather all essential tools. Using the right equipment ensures accuracy, avoids tile breakage, and speeds up your workflow.
Tools you’ll need:
-
Tile cutter or wet saw suitable for large tiles
-
Notched trowel (10–12 mm recommended)
-
High-performance tile adhesive
-
Tile leveling clips and wedges
-
Rubber mallet
-
Tile spacers
-
Spirit level or laser level
-
Mixing bucket and drill mixer
-
Grout float
-
Safety gloves and glasses
Having everything ready beforehand helps avoid interruptions and ensures smooth installation.
Surface Preparation: The Foundation of a Perfect Installation
Proper surface preparation is crucial for large-format tiles. Because of their size, any unevenness underneath becomes visible as lippage.
-
Ensure the substrate is completely level: Use a straightedge or laser level to check the surface. Large-format tiles require substrate flatness of ±3 mm over 2 meters.
-
Clean the surface thoroughly: Remove dust, cement residue, oils, and contaminants. A clean surface improves adhesive bonding.
-
Repair cracks and holes: Any depressions or cracks should be filled using a suitable leveling compound.
-
Apply primer if necessary: Primers enhance adhesion and prevent moisture absorption into the base.
Skipping surface preparation can lead to tile cracking, poor bonding, and visible tile misalignment.
How to Install 600x1200 mm Large-Format Tiles: Step-by-Step Guide
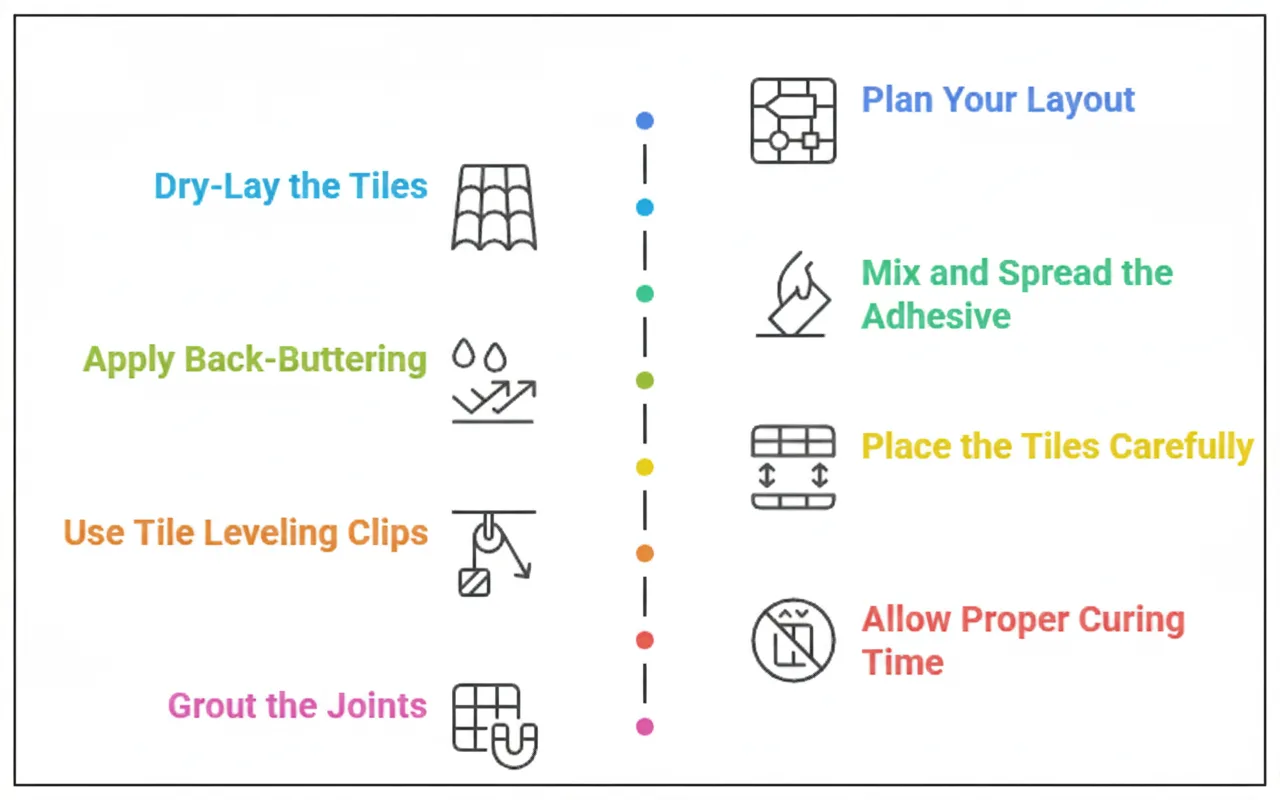
Installing these tiles requires precision, patience, and a structured approach. Follow the steps below to ensure a flawless finish.
Step 1: Plan Your Layout
Start by deciding the direction of tile placement. Large-format tiles look best when aligned with the longest dimension of the room.
-
Mark center reference lines
-
Plan cuts to minimize wastage
-
Ensure symmetry around corners and entrances
Good planning helps avoid awkward cuts and results in a balanced, aesthetic layout.
Step 2: Dry-Lay the Tiles
Dry-laying allows you to preview the final look before using adhesive.
-
Place tiles on the floor without glue
-
Check for color shading
-
Confirm grout joint width
This simple step prevents unpleasant surprises during installation.
Step 3: Mix and Spread the Adhesive
Use a high-quality polymer-modified adhesive designed for large-format tiles.
-
Mix adhesive to a smooth, lump-free consistency
-
Apply evenly using a 10–12 mm notched trowel
-
Work in small areas to prevent drying
Large-format tiles need full adhesive coverage for strength and durability.
Step 4: Apply Back-Buttering
Back-buttering ensures 100% adhesive contact essential for large tiles.
-
Spread a thin adhesive layer on the back of each tile
-
Press gently with the flat side of the trowel
This technique helps eliminate air pockets and improves bonding strength.
Step 5: Place the Tiles Carefully
Lift and position each tile gently. A suction cup lifter is ideal for handling heavy tiles.
-
Align with reference lines
-
Press tiles into the adhesive bed
-
Use a rubber mallet to tap lightly and settle the tile
Positioning must be accurate since these tiles are difficult to move once placed.
Step 6: Use Tile Leveling Clips to Prevent Lippage
Large-format tiles are more prone to lippage (height difference between tiles).
-
Insert leveling clips under edges
-
Place wedges and tighten
-
Ensure all tiles are perfectly aligned
This step ensures a smooth, professional-looking installation.
Step 7: Allow Proper Curing Time
Avoid stepping on the tiles for at least 24 hours.
Curing allows the adhesive to set completely, preventing movement or misalignment.
Step 8: Grout the Joints
Once the adhesive has cured:
-
Remove leveling clips
-
Clean joints thoroughly
-
Mix and apply grout
-
Use a damp sponge to wipe excess
Choosing the right grout color can dramatically enhance your final look.
How Thick Should Adhesive Be for Large-Format Tiles?
A common question during installation is about adhesive thickness. For 600x1200 mm Large-Format Tiles, adhesive thickness typically ranges from:
-
3–6 mm under the tile, depending on substrate
-
Combined with the back-buttered layer
Using the correct trowel ensures the proper adhesive bed. Full coverage prevents hollow sounds, cracking, and detachment.
Tips to Avoid Lippage During Installation
To achieve perfectly aligned surfaces:
-
Ensure substrate flatness before starting
-
Use a reliable leveling system
-
Avoid walking on tiles during curing
-
Apply uniform adhesive coverage
-
Double-check alignment after every tile placement
These tips are essential since lippage becomes instantly noticeable with large-format tiles.
Post-Installation Care & Maintenance
After installation, proper care ensures long-term beauty and performance.
Initial Cleaning
Use a tile-safe cleaner to remove adhesive residue and grout haze.
Routine Maintenance
-
Sweep or vacuum regularly
-
Mop with a mild detergent
-
Avoid acidic or harsh chemicals
Preventive Care
-
Use protective pads under furniture
-
Clean spills promptly to avoid stains
-
Seal grout lines if necessary
With the right care, large-format tiles maintain their elegance for years.
Common Installation Mistakes to Avoid
Even experienced installers can make mistakes. Keep these points in mind:
-
Insufficient adhesive coverage leads to hollow tiles
-
Poor surface preparation causes lippage and cracking
-
Skipping leveling clips results in uneven surfaces
-
Not using back-buttering weakens the bond
-
Rushing the curing process causes tile shifting
Avoiding these errors ensures a strong, flawless installation.
Why Choose 600x1200 mm Large-Format Tiles from Liberta Vitrified?
Liberta Vitrified offers premium-quality Large-Format Tiles that combine aesthetics, performance, and durability. Designed with advanced manufacturing technology, their tiles deliver:
-
Precise dimensions
-
Excellent strength
-
Stunning surface finishes
-
Low maintenance
-
Superior longevity
Whether you’re designing elegant living spaces or modern bathrooms, these tiles bring your vision to life with style and sophistication.
Explore Full Installation Guide
Conclusion
Installing 600x1200 mm Large-Format Tiles requires patience, technique, and the right materials. With proper surface preparation, the correct adhesive, precise placement, and post-installation care, you can enjoy stunning, seamless flooring or wall cladding that elevates any space.
Large-format tiles are an investment in beauty and durability, and with the steps outlined above, you can ensure your installation is both professional and long-lasting.
If you're searching for high-quality large-format solutions, Liberta Vitrified offers a premium range that combines design excellence with unmatched strength.
FAQs
1. Can You Install Large-Format Tiles on a Wall?
Absolutely. Many designers prefer tiling a wall with large tiles because they create that sleek, modern look with fewer joints.
2. Do I need a leveling system for big tile installation?
Yes. A leveling system helps prevent lippage and ensures perfect alignment.
3. How much does large format tile installation cost?
The cost varies by location, tile material, and labor, but it is generally higher than installing smaller tiles.
4. Can I cut 600x1200 tiles at home?
Yes, but you must use proper tools such as a wet cutter or angle grinder with a diamond blade.
5. How long should I wait before grouting large-format tiles?
Allow at least 24 hours for the adhesive to cure before applying grout.
6. Are large-format tiles suitable for bathroom floors?
Yes, they provide a clean, luxurious look, especially when installed with anti-skid adhesive.